How to Use BitLocker to Encrypt Your Device (Step-by-Step Guide)
Data theft, ransomware, and device loss are no longer rare incidents—they’re everyday security risks. Whether you’re a professional, IT admin, or privacy-conscious user, full-disk encryption is one of the strongest defenses you can enable on a Windows system.
In this guide, you’ll learn how to use BitLocker to encrypt your device, why it matters, and how to manage recovery keys securely.
What Is BitLocker?
BitLocker is Microsoft’s built-in full-disk encryption feature available on supported editions of Windows. It encrypts your entire drive, ensuring that data remains unreadable without proper authentication—even if the device is stolen or removed from your control.
Key Benefits
Protects data at rest
Integrates with TPM (Trusted Platform Module)
Minimal performance impact
Enterprise-ready with centralized management
System Requirements for BitLocker
Before enabling BitLocker, ensure your device meets these requirements:
Windows Edition: Pro, Enterprise, or Education
TPM: Version 1.2 or later (TPM 2.0 recommended)
Administrator Access
Backup Option: Microsoft account, USB drive, or secure storage
⚠️ BitLocker is not available on Windows Home editions by default.
How to Enable BitLocker on Windows (Step-by-Step)
Step 1: Open BitLocker Settings
Press Windows + S
Search for Manage BitLocker
Open the control panel option
Step 2: Turn On BitLocker
Locate your system drive (usually C:)
Click Turn on BitLocker
Windows will verify your system configuration before proceeding.
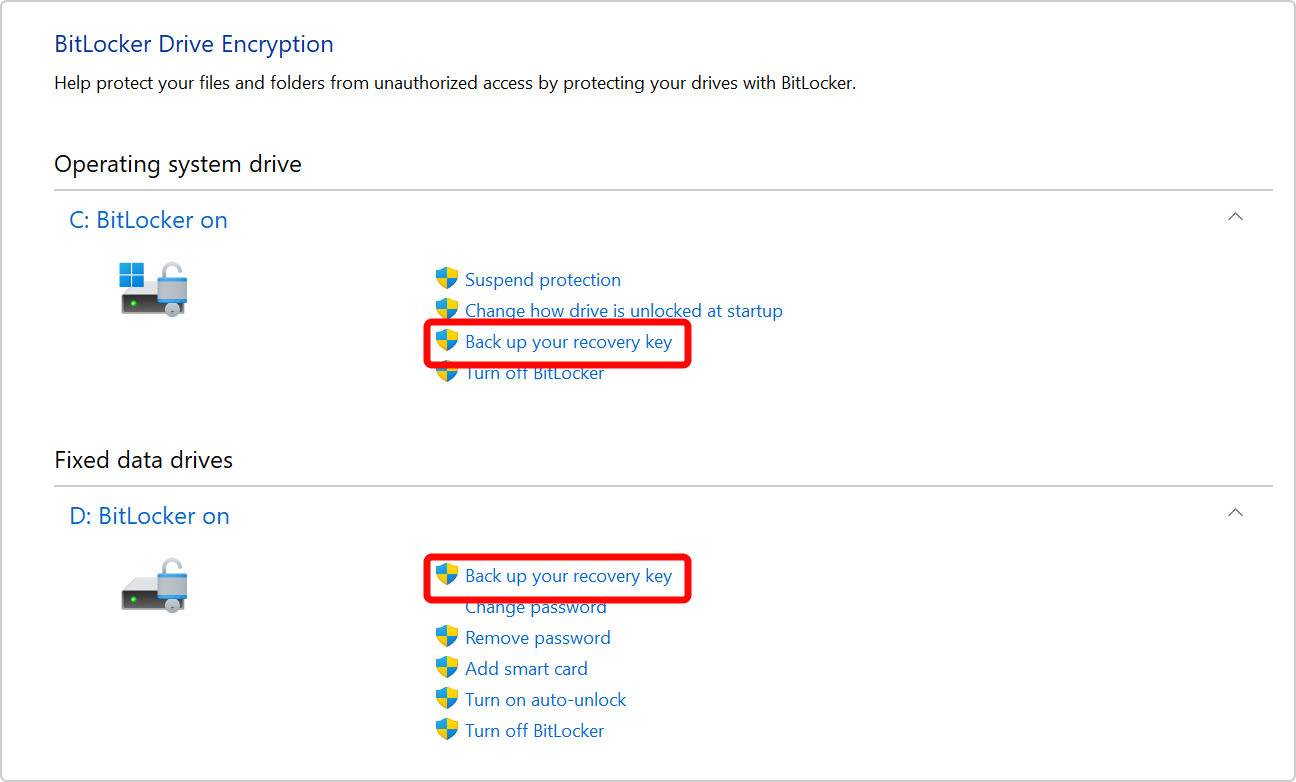
Step 3: Back Up Your Recovery Key (CRITICAL)
Choose one or more of the following:
Save to your Microsoft account
Save to a USB drive
Save to a file
Print the recovery key
🔐 Never skip this step. Without the recovery key, encrypted data cannot be recovered.
Step 4: Choose What to Encrypt
Encrypt used disk space only (faster, recommended for new devices)
Encrypt entire drive (best for older systems)
Step 5: Select Encryption Mode
New encryption mode (XTS-AES) – Best for fixed/internal drives
Compatible mode – For removable drives
Step 6: Start Encryption
Click Start Encrypting. You can continue using your device while encryption runs in the background.
⏱️ Time required depends on disk size and type (SSD vs HDD).
How to Check BitLocker Encryption Status
Open Manage BitLocker
Look for:
✔️ BitLocker On
🔒 Encryption percentage
🔑 Recovery key status
Managing BitLocker After Setup
You can:
Suspend BitLocker (useful during BIOS/firmware updates)
Change your PIN
Back up recovery keys again
Turn off BitLocker (decrypt drive)
For enterprise environments, BitLocker integrates with Active Directory and Microsoft Intune for centralized control.
Best Practices for Using BitLocker
✔ Enable BitLocker before storing sensitive data ✔ Store recovery keys offline + cloud ✔ Combine BitLocker with strong login passwords ✔ Keep TPM and BIOS firmware updated ✔ Use BitLocker alongside endpoint protection tools
Common BitLocker Issues (and Fixes)
Problem: BitLocker asks for recovery key on every boot Fix: Update BIOS, reset TPM, ensure Secure Boot is enabled
Problem: BitLocker missing Fix: Check Windows edition (upgrade from Home → Pro)
Final Thoughts
BitLocker is one of the most effective, zero-cost security features available to Windows users. With minimal setup and strong cryptography, it provides enterprise-grade protection against data loss, theft, and unauthorized access.
If you care about device security, compliance, or data privacy, BitLocker should be enabled on every supported system—no exceptions.